I’m planning to build another radio telescope (I’ll write more about that once it’s a bit more advanved), and for that, I need to solder a lot of SMD stuff — mostly because many of the parts I need are only available in SMD. This has a few advantages — especially it’s cheaper and smaller — but it can also be very difficult to do with a soldering iron, for QFN packages for example. Common methods to solder such things include insane soldering iron skills (which I don’t have), temperature-regulated ovens (which are large and not that cheap), hot-air guns (which are quite expensive), and hot plates (which I tried, but it didn’t turn out to be very convenient — the heating times are long, and the temperature is difficult to control). So recently I found this nice product (called “TENMA – 21-10135 – PRE-HEATER”) and figured that it might be useful for this purpose (and with around 45 euros, it’s quite a bit cheaper than the alternatives). And indeed, it is:
 |
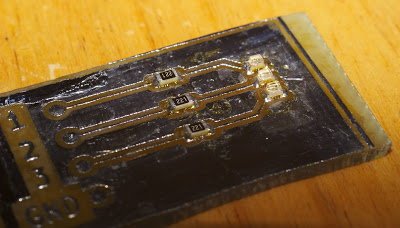
| A test-board with 0805 / 0603 resistors / LEDs soldered by a SMD pre-heater |
Step 1: etching boards
This is not as difficult or dangerous as it might sound. All you need is a laser printer, a hot iron, a bucket, and the (quite cheap) Sodium persulfate acid. You can easily buy the latter online in most electronics online shops.
I will not describe the method here in full, since there’s many nice tutorials out there already. But basically, you just print your board (mirrored!) onto some paper with a laser printer, then transfer the toner to the board by using the hot iron, and then you drop the whole thing into the acid. The areas with the toner are protected, but the rest of the board’s copper layer will be dissolved. Instead of a complete description, I’ll just list things which I found to be important in this process:
- Try different kinds of paper, some are much better than others.
- Try different laser printers; some print much sharper than others (maybe depends on age, or make? Don’t know).
- Be sure to select “crop / keep scale” when printing, otherwise your components won’t fit!
- Don’t forget to print mirrored.
- Apply a lot of pressure to the hot iron, that seems to be more important than the temperature.
- If the toner is blended on the board, then either the paper is bad or the temperature is too high.
- When done with removing the paper from the board, make the board very hot again for a while. That way the toner will stick to the board better. It significantly improves the result for me.
- You don’t need to be that careful when removing the paper; I found it to not matter much if there’s paper left on the toner-filled areas. Just make sure to remove it where the copper is still visible.
- Having the acid cold and still will not only cause the edging process to take ages, but also significantly deteriorate the quality of the result. You can either use a warm water bath and stir, or — what I find very convenient and what worked very well for me — put a hair-dryer over the bath, which will both heat and stir it simulataneously (the stirring only works if your bath is very shallow, but it usually is).
- Make sure you dispose of the acid professionally, since there’s copper in it, you must not just pour it away. I want to try removing the copper by electrolysis, but I currently don’t have the necessary platin wire.
- Add filled areas to your board and connect them to ground; this not only improves the electrical behaviour of your circuit, but also saves you a lot of acid, pollution, and time.
If you follow this advice, then etching boards with 0.1mm wide tracks should be no problem using this laser-printer method. The tracks on the board above are 0.2mm wide.
For designing boards, there’s several tools available; I used kicad, but I can’t really compare it to others (since I didn’t use anything else yet). It’s quite full-featured, but its GUI could need improvements in several corners.
Step 2: Soldering
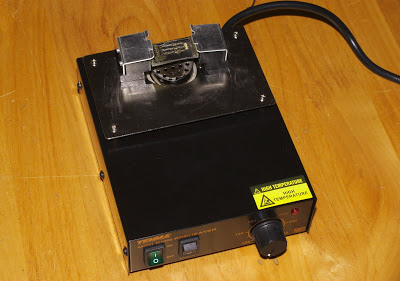
For soldering the board, I used the pre-heater mentioned above. It basically just blows hot air out of a hole, and you can put your board on top of that.
 |
| The pre-heater with a board attached |
The device is meant to be used in combination with a hot-air gun, but it turns out you can also use it stand-alone 🙂
It allows to select temperatures as high as 350°C, which is more than enough to melt solder. In practice, a temperature of little more than 250°C turned out to be best. Ordinary 60-40 solder melts at a lower temperature, but consider that the air blowout temperature is not going to be the same as the temperature on the upper side of the board.
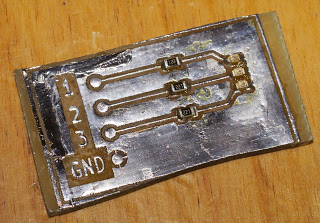
I just put some ordinary solder (with a soldering iron) on the pads, then fixed the parts on them using viscous flux. Using soldering paste would possibly be preferable but I don’t have any handy. After that, putting the board onto the “pre”-heater and “baking” it for about two minutes was enough to get all the components soldered nicely. Here’s another shot of the resulting board:
It obviously doesn’t do anything useful, it’s just a test board with three LEDs.
Next, I’ll try whether I can solder the network analyzer I planned with the same technique 🙂
Categories: Everything
Tags: etching, radio telescope, soldering

